Below you will find handwriting tools created by Teach Grow Sow. These are designed to help children’s muscles memorize direction long before they ever start to form letters. They have been designed to help your children and students have fun while playing to learn.
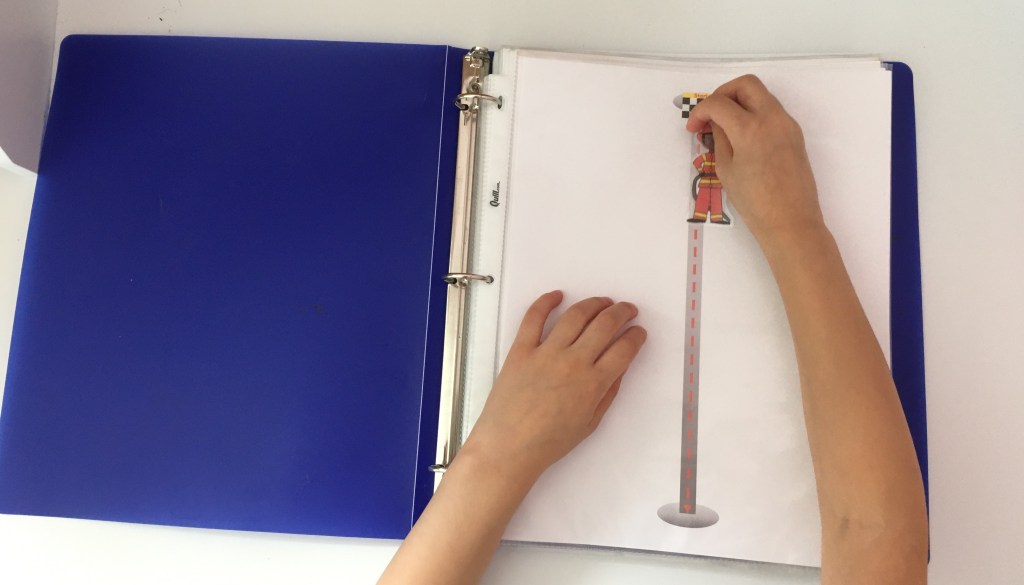
Print these pages and place in page protectors in a three-ring binder. Children can trace the shapes and letters with their finger, and later with a dry-erase marker.
Cut out the tracing shapes. If you have a laminator, that will help them to keep their shape after many uses. If you don’t have one, placing the shapes in contact paper or two pieces of packing tape back-to-back will also make them sturdier. Let the child hold the tracing shapes to move along the shapes and letters. Later, you can tape them onto a dry-erase marker as the child practices writing.
Handwriting Level 1: Shapes

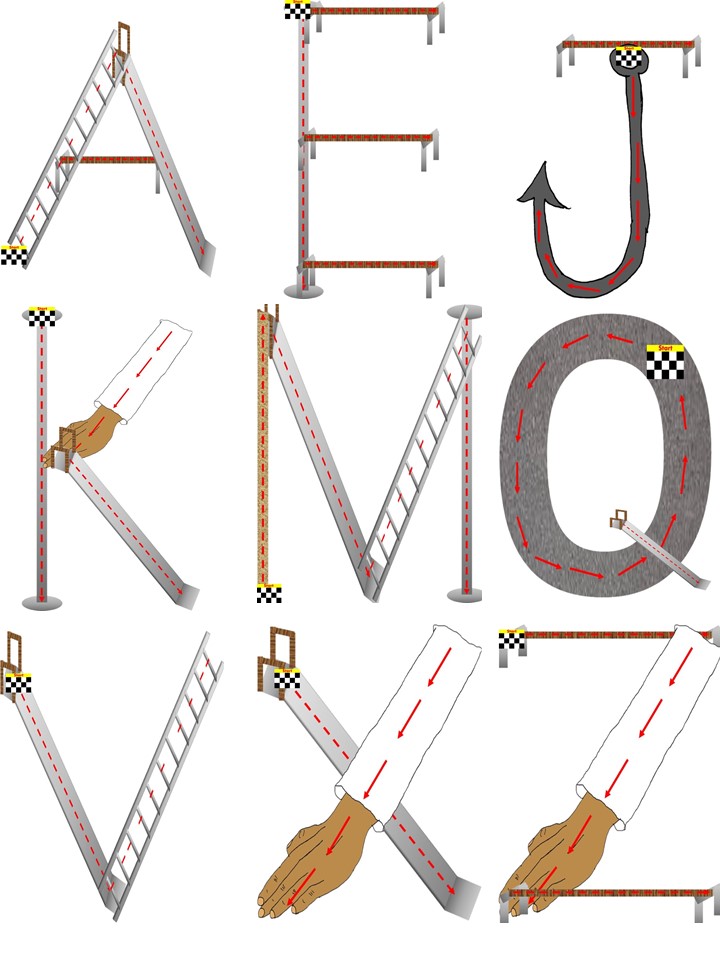
Handwriting Level 2: Uppercase
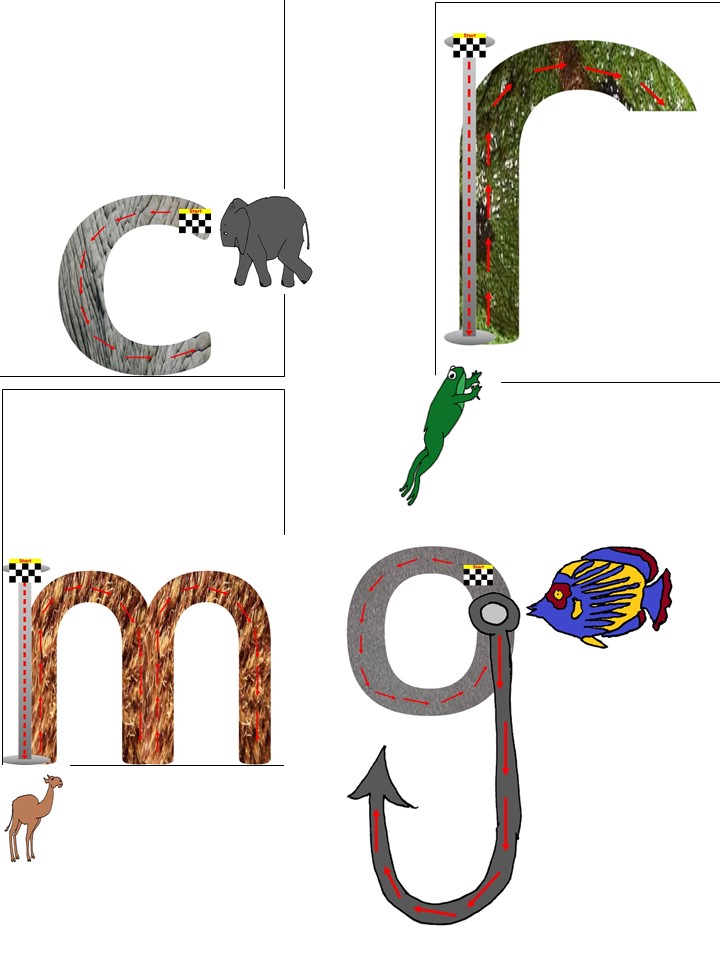
Handwriting Level 3: Lowercase
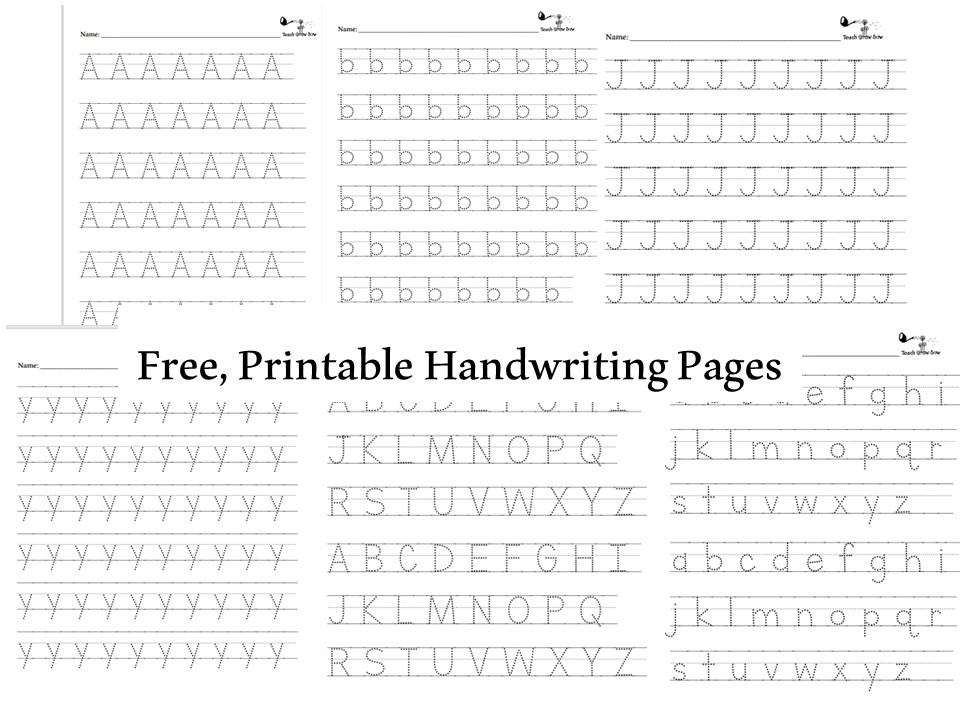
Handwriting Level 4: Writing Within Lines


Tips for Teaching Handwriting

Use “elephant ear” pencil holders to teach children how to properly grip their pencils.
Sharpen pencils until they are half-length. This may feel wasteful, but children’s small hands can feel overwhelmed by full-size pencils.

Students with sensory issues may benefit from a weighted pencil. This increases their sensory input, which can improve focus. A weighted pencil can also stabilize hand movements, leading to better motor control and neater handwriting.
To make a weighted pencil, find washers that just fit snugly on the pencil, then wrap rubber bands around each end. Experiment with 1-4 washers to find the right weight for the child.

Have questions or feedback? Email:
teachgrowsow@gmail.com
Follow Me
Get new content delivered directly to your inbox.
